Summer of Dresses - I Declare Victory for Ava

8.28.2013

Hello all you lovely dress parade attendees.  It's been a fun summer of pretend drinking, cake eating, and hot dudes to fan us off.... but sadly the fun as to end sometime. I'm gonna wrap up with parade with a UFO that might have never seen the light of day if it wasn't for the Stash Busting Sew-a-long theme.  That's right EmSewCrazy, you made me finish a UFO! Internet high five my friend.
The start date of this project has long been overwritten by song lyrics, I blame you Black Keys! What I do remember is that swiss dot was originally bought for the contrast and it seemed to clash with the main fabric.  The fabric "probably" wasn't so much the problem as the crew neck on the inset.  Crew necks and my figure just don't jive.  I then tried to circumvent this problem by completely leaving off the contrast pieces and put spaghetti straps on the bodice.  Except that I didn't get any further than ripping off the contrast before throwing the whole thing in a box.
Because what I'd mentally blocked out was that the purple "cotton" behaves nothing like cotton and truly is a fabric woven by the devil. I'm might just throw every last scrap in a metal trash can, set it ablaze, then dance around it while cackling. "Die devil spawn, die!"
So it makes perfect sense that I decided to make my sewing life even more difficult by choosing some stashed silk as the contrast.  Cause sewing THREE bias binding in silk isn't the express train to crazy town.  This is your doing devil fabric!  You made me think this was a good idea.  Fabric says nothing, just steals my watch.

So in summery I would say the pattern is awesome. The fabric is pretty/evil. The sewing process was like repeatedly sticking seam rippers in your eyes, but the finished dress is pretty cool. That's perfectly clear, right. Snort, snort.

Pattern
Ava Dress from Victory Patterns. I bought the PDF version because back in the day she didn't have paper patterns.  As I mentioned in my PDF post, the formatting this company uses is excellent and I had no problem putting together the rather large pattern.

Fabrics used
The main purple print was from Sawyer Brooke's backroom area and was labeled dress weight cotton.  I'm 80% sure this is not actually cotton since it behaves exactly like a rayon.    However all other fabric I've ordered from Sawyer Brook has been properly labeled and I haven't done a burn test.  Could be the original supplier mislabeled it or it's some cotton that has been highly processed.

I also want to say that Sawyer Brooke's customer service is excellent. My original 3 yards was lost in the mail and they furnished me with another 3 yards with any questions.  Then months later the original 3 yards somehow got out of the UPS's black hole and mysteriously appeared on my door step.

Contrast is some white crepe de chine from Gorgeous Fabrics that I bought to make a button down shirt.  Now that I see how transparent it is I might have to rethink that plan.
Pattern changes/alterations
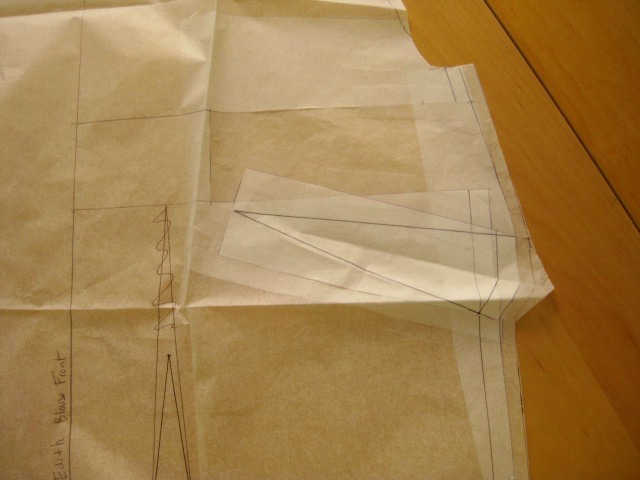
All of these were done eons ago so I'm just reading my pattern.
1. Added 5/8" to the shoulder seams of the contrast to make the neck scoop deeper.  The neckline binding then had to be increased the same amount.
2. Increased the length of the bodice 1 1/2".  I'm guessing this was drafted for a smaller cup size and my "assets" suck up a bunch of the length.
3. Moved the dart position over to the right slightly to better line up with my apex point.

Confessions/Advice
1. I had the same problem with the bias areas of this skirt as I did with the Tania culottes.  The mostly bias side skirt panels stretched out several extra inches and I had to trim them down to match the straight grain panels.

2. When doing bias bindings in silk I've found that the width of the binding changes after I've sewn the first seam.  Going back and trimming the binding down to a consistent size made my neckline a lot neater looking than my arm hole bindings.
3. I did not bias bind the sweetheart seam between the two fabrics.  Instead I serged the seam allowance and then edge stitched it down on the man fabric side.

4. The skirt is very full so make sure you pick a fabric with plenty of drape and a lighter weight.

Husband Comment
Husband -"Hey that's cool with the two fabrics." Me - "But the bias binding is all crappy."  Husband - "What are you talking about? it looks fine."

My Final Thoughts
My bias bindings are kind of sucky but the rest of the dress is well constructed and comfy to wear.  If I was making this in a less slippery fabric or got better bias binding skills I'd make this again. I'd also put this skirt on another bodice in a heartbeat. Look at it, it's so big and swishy!
I hope you've enjoyed the summer dress parade. It certainly was super fun to sew as many dresses as possible during the summer months, while having all of you along for the ride.  Summer of Dresses Forever!!!!

Burda 102 Dress - The Appendix

8.26.2013

I've got two more little "helpful" tidbits related to Burda 102 dress that I'm gonna talk about today.  Both of these seemed a little too big to stuff under the Confessions/Advice section of the review, so I've split them out to this extra blog post. Open up your brain hatches cause I'm about to drop some learning on you.

Tidbit 1 - How to grade up pattern pieces using nested sizes.
In my review post of Burda 102 I mentioned that my figure is a size 42 on top but a bigger size on the bottom. According to the Burda size chart my bottom half is a size 46, which is considered a plus size. So what patterns do you sew if only half of your body is plus?  Thanks to a handy tip I picked up on the PR boards years ago, you can pick the "regular" size and grade up the areas that need it.   (My thanks to the person who originally posted this tip, who's name I have long since forgotten.)

This method works if...
a. You only need to grade up a few sizes.
b. The original pattern comes with multiple sizes.

I'll be demonstrating this technique on the front skirt of Burda 102. Now on to the knitty gritty!

1. Trace the largest size of the pattern including all darts, notches and other markings. For this pattern it's size 42 which is the solid line.
2. Take your traced side seam line and move it over the number of sizes you need to grade up.  I need to grade up 2 sizes so I'll be moving the traced line over to the size 38 which is a short/long dashed line.
3. Trace the solid line side seam line again.
4. In this pattern the side seam is graded 3/8" but the dart is graded 3/16".  Moving the side seam line to the size 38 puts the dart at a size 34.  If you wanted to grade that area up 2 sizes move the dart over to the size 38 after tracing the new side seam.  My figure needs more room in that location so I traced the new dart without re-positioning the side seam effectively grading the dart location up 5 sizes.
5. Scribble out or X out the original dart placement and, if it's a Burda, add your seam allowance. Then you're ready to make a muslin.
For this pattern I graded up the front skirt, back skirt, front and back insets this way.  Then the very bottom of the bodice needed to be increased so that the underbust seams match.  For that seam I just added 3/8" to the bottom of the side seam and blended it into the rest of the piece.
If you try this process I strongly recommend making a muslin to make sure that all the pieces fit together. Occasionally I just forget to grade one piece up, but the muslining process always catches this before real disaster strikes.

Tidbit 2 - How to fold the sleeves on this dress.  
If you were hoping for more video of me then your wish has been granted!  I couldn't find a way to get a good close up on the sleeve, since it's just me working the camera. So for reference here's a pic of the sleeve clearly showing it's markings.
Now on to my "instructional video".

Extra Silliness - Blog Voices

8.25.2013

I'm joining the sewcialist crowd and posting my blog voice.  The fun of this meme is to show now language pronunciations varies around the world.  I don't mention it until half way through my video but I currently reside in the Philly burbs....and yes I love "Rocky."

To do the meme you had to pronounce the word below and then answer the list of questions.

List of Words:Aunt, Route, Wash, Oil, Theater, Iron, Salmon, Caramel, Fire, Water, Sure, Data, Ruin, Crayon, Toilet, New Orleans, Pecan, Both, Again, Probably, Spitting image, Alabama, Lawyer, Coupon, Mayonnaise, Syrup, Pajamas, Caught

List of Questions:
What is it called when you throw toilet paper on a house?
What is the bug that when you touch it, it curls into a ball?
What is the bubbly carbonated drink called?
What do you call gym shoes?
What do you say to address a group of people?
What do you call the kind of spider that has an oval-shaped body and extremely long legs?
What do you call your grandparents?
What do you call the wheeled contraption in which you carry groceries at the supermarket?
What do you call it when rain falls while the sun is shining?
What is the thing you change the TV channel with?
And for more fun/learning on this topic here's the link to the linguist maps I mention in my video. 

Summer of Dresses - Burda 102 Dress

8.23.2013

Well parade goers, some days you're the windshield and some days you're the bug.  My number of wadders tends to be low because I muslin just about everything. That lets me work out fitting problems and weed out any styles that don't suit me.  However even experienced sewcialists sometimes make an error in pattern/fabric pairing and this next dress is a fine example of that.

I give you Burda 102 in a stretch cotton sateen.  So let me just say straight up that this is very nice fabric and would probably look swell as a pair of pants.  But as this dress....not so much
Sometimes I forget how unforgiving cotton can me in the wrinkle departments.  Argh just looking at these pictures makes me cringe just a bit.  I'll pinky swear that plenty of time of was spent fitting this bad boy but it doesn't really look it.

Pattern
Burda 102 from issue 8/2012 which is also available as a PDF download from Burdastyle.

Fabrics used
Amethyst Stretch Cotton from Gorgeous fabrics (Still in stock) It would make a beautiful pair of pants or a pencil skirt.

Pattern changes/alterations
1. This pattern goes up to size 42, I'm a 42 on top but 2 sizes bigger on the bottom.  To fix this I use the nested sizes to grade the bottom pieces up so that it fits me.  I'll do a little how to on this next week cause pics need to be taken.
2. The armholes on this pattern seemed really big. Since the bodice needed to be shortened anyway because of my short torso I folded out 3/4" length across the bodice in the middle of the armhole.
3. Usual 1/2" forward shoulder adjustment.
4. Since this was fancy type of sleeve I didn't want to do a standard forward adjustment on the sleeve head. The high of the sleeve cap needed to be reduced due to the bodice change, so I used that to also adjust for the forward shoulder.  Instead of folding out 3/4" evenly across the sleeve, I started with 3/4 at the back of the sleeve and increased it to 1 1/4" at the front of the sleeve.
5. Increased the upper back of the bodice 3/8" at the armhole edge.
6. Increased the dart intake on the back skirt an addition 3/8".  Also took in the bodice princess line seam in the same amount.

Confessions/Advice
1. This is a case where you have great fabric and a great pattern but they don't work that well together. I thought having a fabric with some body would be a good idea, but maybe this has too much body. Especially since I used it as a self lining for the bodice, which made it armor thick.  Merche Martinez made her version up in a stretch wool crepe which seems to suit the design much better.

2. The pattern says, for stretch wovens only. No kidding!  I can hardly get this on even though it is a stretch woven.

Husband Comment
"You're making Another dress? What's up with those sleeves?"
Did you say something about my sleeves? Don't make me stab you with my specialty stabbing shears. Love you big sleeves.

My Final Thoughts
I still like this pattern, so maybe I'll give this another go after the sting has passed. Gorgeous Fabrics has some poly stretch crepe that just might do the trick. I'm also happy to report that this dress completes my "Me Made May" inspired list.  Wow I made a list and followed through, don't even know who I am anymore.  A "responsible" blogger? Say it isn't so!

How I assemble PDF Patterns

8.21.2013

PDF patterns some people love them, some people hate them, but it's a format that's here to stay. (Until we can transport everything to our house! Damn it Scotty, why isn't the transporter working?!)   I didn't earn the nickname "All the patterns" Heather by turning up my noise at any kind pattern format, so many a PDF pattern has been assembled on my dining room table.

When I tweet, "Gluing together a PDF pattern," there are always a few people who want to know why the heck I'm gluing instead of taping. Well, gluing seems easier to me and holds up a lot better over time since I keep the hard copy of the pattern intact.  It also makes PDF pattern assembly like first grade cut and paste....ahhh those were the days. So here's a little step by step of how I put together PDF patterns for parties that are interested.  I'll be using Burda 135 during my little tutorial.

These are the supplies I get together for PDF assembly. Self healing cutting mat, razor blade, clear ruler, and  Aleene's Tacky Glue.
I prefer Aleene's Tacky Glue because it dries quickly but still gives you a few minutes to slide around the pieces before it sets up.  It's also is very thick so the paper doesn't get wet making the ink run. It's water soluble for easy clean up but also very sturdy on the paper.

Step 1.  Check to see the pattern to see how many tiles across it's been formatted for. I'm gonna work with one row at a time during the assembly process so I like to know how many pages to pull out at a time.  This Burda pattern is 6 tiles across.

Step 2.  Take all 6 tiles of the first row out of the stack.  The first page leave as is, the rest of the pages cut off the left hand margin with the clear ruler and razor blade. (You can and probably will cut up your plastic ruler doing this so use a crappy one. )

(P.S. This is my favorite kind of formatting for PDF patterns. The tiles are clearly delineated where they begin and end, there is no overlap between tiles.  If you cut off the margins then the pattern pieces will line up correctly.  Burda, Grainline Studios and Victory patterns all use this formatting. There are slight mods on this format that also work, like dotted lines instead of solid and I don't mind if the pattern overlaps outside of the margin.  What I'm saying is pattern designers, don't make it hard for people to assemble your pattern. If you wanted to know what formatting I think you should use, it's this one. Steps off soapbox)

Step 3.  Take the first page and run a line of glue down it's right margin and place the second page so that that pattern seam lines line up.  (Always choose pattern seam lines over any other markers) Continue putting gluing the rest of the tiles in this manner until all 6 tiles are joined.


Step 4.  Take out all the tiles from row two of the pattern, in my case 6.  Leave the first page alone and cut off the left margins on the rest.  If row two of the pattern is below row 1 cut off the bottom margins of ALL the tiles.  If row 2 is above row one then cut off the top margins of ALL the tiles.  (In my Burda example row 1 is the bottom of the pattern and you glue up. This is opposite of most PDF's I've worked with.)

Step 5. Put glue on either the top or bottom margin (depending on which way the pattern is growing) of the first tile of row 1 and place the first tile of row 2 on it.
For the second tile put glue in the right margin and the top/bottom one. Continue gluing in this manner until row 2 is glue together with row 1.


Step 6. Continue cutting off margins and gluing as in the last step until the entire PDF is completed.

Step 7.  Let the glue set up for 5 minutes or so.  Aleene's doesn't take long to dry, just check your pattern if you're using a different kind of glue. Once the glue is dry you can trace or cut out your patterns.

I am a hardcore tracer so once the pattern is copied onto trace paper I roll up the PDF wrapping paper style and put a rubber band on it. While I'm working on fitting the garment the PDF roll will hang around my sewing area in case I need to trace another size for see if any marks were not copied.  Once the fit is finalized the PDF roll gets stored in a closet upstairs until I need it again or it gets smashed to bits.
So that's how PDF's get assembled around here, hope you have enjoyed my anal retentiveness.  So what are your feelings about PDF patterns?

Summer of Dresses - 80's Flashback

8.19.2013

Hello dress parade attendees, I'm sure I don't have to tell you about the dangers of Etsy. Some day you might find yourself trolling that site for wrap dresses without even knowing how you got there.  It happens right?  Someone on twitter mentions they like wrap dresses, you like wrap dresses, maybe Threads just had an article about wrap dresses.  All of a sudden you NEED TO BE MAKING ONE!
Anyway I "think" that's how this pattern got bought, it's all a little hazy now. Or maybe I've had too many parade beverages. No really, it's been long enough since I made this that all information has been deleted from my brain and replaced with song lyrics. It happens people.
This pattern is from the 80's which we are NOT calling vintage cause I was alive then and do not consider myself to be aged to vintage status. Let's just say Flashback....AHHH what am I doing in the 80's...wait wait, sweet dreams Are made of this.

Pattern
Vogue "Very Easy, Very Vogue" 7526.  I bought my copy off of Etsy because I though the sleeveless version looked rather modern. Let's not talk about the sleeves on the other one.
Fabrics used
Green batik rayon from Steve's sewing in King of Prussia.  Was pleasantly surprised that the place I took the sewing machines for servicing also had fabric.  I'm a sucker for a subtle batik so this came home with me.

Pattern changes/alterations
This pattern came with 3 sizes 12,14,16.  The 16 was my actual bust measurement so I traced that and added ease to the waist and hip area.
1. The bodice had a very big bust dart so I reduced the dart intake from 3" to 2".
2. Then I added 1/2" to the side seams of both the front and the back bodice.  (This turned out to be a bit of overkill and I had to take in the side seams on the actual dress.)
3. The back dart was moved 1 3/4" closer to the side seam because it seemed to be in an odd location.
4. Added 5/8" to the side seams of the skirt.
5. The skirt was very long, I chopped 4" off before cutting the fabric and took another 1" before hemming.
6.  I overlapped the two bodice pieces not on CF but further over to give a little more coverage in the bust area. Not that it looks that way. There's a thread tack there too, I swear.

Confessions/Advice
1. The pattern came with armhole facings but those things are the worst.  Instead I bias bound the armholes. As much as I hate sewing bias binding these actually turned out well.
2. The collar instructions were to make a small turned hem for the edges that do not get sewn into a seam.  I did this but have a sneaky suspicion that there is a better way to finish those edges.
3. Unlike the armhole facings, the neckline facings are not trouble in this dress.  With the giant collar covering most of the bodice you can tack them down just about anywhere.

Husband Comment
"That's well constructed and the neckline is nice as well you know."

My Final Thoughts
I bought this cause the reverse collar was snazzy looking and do think it looks cute in real life.  However I think it would look better on a person with a normal or long torso.  Just because a whole lot of visual interest gets put on the low bust which will indirectly highlight where your waist position is.  That caveat aside I do like this dress and think that rayon lent itself well to the design.  

Now all I need is an ironic 80's perm.....

Secret Stash - Indian Summer

8.15.2013


It's already getting cool in my neck of the woods but I'm still thinking about warm weather patterns. Maybe because a bunch of new ones are being shipped to my mailbox....shhhh don't tell my husband. Everybody knows that a sewcialist "needs" new patterns to sew up all that stashed fabric in the lurking closet. You'll back me up on this won't you?

But we're not here to talk about the real stash, but the stuff I'd buy if there was unlimited money and storage space. What am I currently itching to put in my virtual shopping cart?  I'm so glad you asked.
1. Want your own Maria Denmark Edith shirt to wear while strolling around town?  How about using this Dusty Sea Green cotton shirting from Waechter's.  It would look great with either neutral colored or bright shorts. Make sure to tell any would be suitors that your ancestors were Nordic.

2. How gorgeous would the Blueginger doll Mae blouse be in this eyelet from EOS! Pair with a red pencil skirt and get your Joan style vavoom on.

3. Jump on the By Hand London Anna dress craze and make your first one (you're contractually obligated to make at least 3) out of this lovey abstract Carolina Herrera print from Mood Fabrics.

4. Maybe you're more in the mood for some lounging around the house with your beloved dog/cat/toy frog. Whip up some Grainline Studio Lakeside PJ's in this fun teacup print cotton (Also from Waechter's) and you'll always be properly accessorized while drinking a giant mug of tea.

That's all for this episode of secret stash my lovelies.....damn I want that teacup cotton!

August Sewcial Bee - Late Season Strawberries

8.14.2013

I've had so much fun looking at everyone's pictures in the Sewcial Bee Flickr group. So many beautiful garments and it seems like everyone had a good time.  Thanks so much to Gida Studio for a fun challenge for our second round of the Bee.

So what did I sew for the Bee?  Well just a little mash up of the bodice from Vogue 1027
and my favorite Lady Skater skirt.
My sewing time was limited for this round of the Bee so my mantra was "Keep it simple, Stupid." Guidelines were, use a TNT pattern, minimal or no closers, and for the love of god try to use a knit.  Luckily for me this bamboo knit from Harts.com fit perfectly into GidaStuido's garments inspired by food challenge. Yum strawberries!
I've been itching to make the Vogue 1027 dress again since posting back in May about my first version. It has gaping neckline problems that keep me from wearing it often.  Many of you kindly gave me suggestions for fixing the problem and I was eager to try some out. This is the technique I settled on and it worked great on this knit.
1. Ran a line of basting in the neck edge of the fronts.
2. Very slight gathered the neckline, just the tiniest bit.
3. Used some of the knit tricot stay tape over the basting line on the wrong side of the fabric.
4. Folded the edge over and used the coverstitch machine to finish the edge.
For the sleeve edges I sewed on the facings and then finished the edges with the coverstitch machine.  The facings were trimmed down to the stitching so you get a nice edge finish that doesn't flip out.
There were only 2 yards of this fabric so I couldn't use the huge circle skirt that comes with the Vogue pattern.  Instead the Lady Skater skirt was subbed in with 2 additional inches of length.  Similar look just a little more flirty.
Since I've made Lady Skater mash ups with both Vogue and New Look bodices a quick list of the differences between the patterns might be helpful to others.

Breakdown of the design differences...
Vogue 1027
- Bodice wrap only goes over half of the front
- Pleats on waist seam
- Cut on Kimono sleeve

New Look 6097
- Bodice wraps entire front
- Pleats at side seam
- Set in sleeves

Personally I feel that the Vogue bodice is a little "fancier" because it shows a bit more cleavage.  I love the kimono sleeve, but that does limit your sleeve options unless you're comfortable with pattern drafting. The New Look bodice is more casual because the neckline is not gonna dip as low due to the full bodice wrap.  Set in sleeves make it easy to swap out different lengths and the Lady Skater sleeves fit almost perfectly into the armholes.  So now you know....and knowing is half the battle.

Thanks again to everyone who participated in the Sewical bee.  For those of you who where busy, don't worry we'll do it again. :)

Maria Denmark Edith Top - You'll be Retro Fabulous.

8.12.2013

Hello fellow sewcialists, some of you know I've been drooling over the Maria Denmark Edith blouse since first seeing the prototype garment. It pretty much has everything I like in a summertime button down blouse.
Kimono sleeve...check, collar...check, darts galore...check.  Can I make this up in that narrow vintage cotton I have in the stash, YES I CAN!

So I dropped everything and whipped one up just in time for a trip to the in-laws.  One must put decorative landscaping/fences to good use after all.  Thankfully they don't ask questions when I break out the tripod.
This was the first pattern I used since Maria redesigned the formatting for her PDF downloads and I loved the change.  Every page had a nice red dotted line where the pieces should overlap.  It was easy peasy putting the whole thing together.

Now on to the proper review....
Pattern
The new Edith top/dress from Maria Denmark.  I used a combination of size 42/44.

Fabrics used
Some vintage cotton snagged on Etsy.  This was probably quilting cotton but I liked the cherry gingham print and decided to purchase it for a top.  (Shop is Leona's Old Linens, if you're interested.)

Pattern changes/alterations
1. My usual 1" drop and diagonal tilt of the bust dart.  I've found through past trial and error that this placement works best for me.
2. Dropped the top point of the front fish eye dart 3".
3. Increased the dart intake of the back fish eye dart 1/4".
4. The collar felt a little tight and the bottom of the armholes were digging into my underarms. It fix this I took 1/2" off the shoulder seam at the outer edge and graded it into nothing at the collar side.  Then I dropped the bottom of the armhole 1/2".  This took care of both my fitting problems and put the blouse waist at my natural waist.
5. Normal 1/2" forward shoulder adjustment.
6. Added 1/4" more ease to the hips.
7. Slightly curved the hem at the side seam on both the front and the back.

Confessions/Advice
1.  I used a bias band finish for the armholes.  It was a bit tricky since kimono sleeves have a tighter curve at the bottom than a normal sleeveless blouse. I'm still pretty pleased with the finish.
2. Next time I'd make the front facing slightly wider so I don't feel like it wants to flip out.
3. I never do sway back adjustments on blouses with back fish eye darts but it's probably something I should do.
4. There is no button placement on the pattern so what I did was to put on the shirt and decide where the bust level button should go. Then divide the space evenly for 5 buttons.  On my shirt the top button is 14" from the hem and the rest are spaced 2 1/4" apart.
5. My version has a shirt tail hem in the contrasting hot pink top-stitching....which I seem to have forgotten to take a photo of.

Husband Comment
"You did a really good job on the hems. What are these, cherries?"   I did unpick and redo that hem, so husband points for noticing.

My Final Thoughts
I feel all Bettie Draper put together when wearing Edith with some Colette Clovers.  Now I just need to work on my Nordic bitch stare while sucking on some menthols. "No one likes a liar Sally, now make me a drink."
In closing I think this is a great little pattern and would recommend it to anyone comfortable with making buttonholes.  So make yourself one and find a fence to pose in front of....maybe your husband will photobomb you too.
Proudly designed by Mlekoshi pixel perfect web designs